Alarms
BusyCal has a flexible selection of alarms to remind you about scheduled events. An event can have one or more alarms, each of which can occur at or before the event’s start time.
Creating Alarms
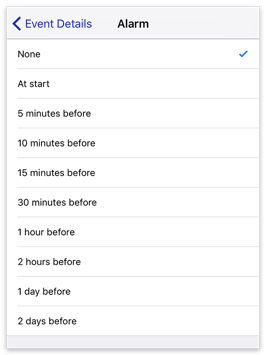
To add an alarm to an event, to to its Event Details view, make sure you’re in Edit mode, and tap Alarm followed by the desired alarm interval—None, At start, or x minutes/hours/days before the event; or, if you’ve set a travel time, At start of travel, or x minutes/hours/days before travel.

Once you’ve added an alarm, another Alarm entry appears in the Event Details view, so you can repeat the process to add one or more additional alarms.
Setting Default Alarm Intervals
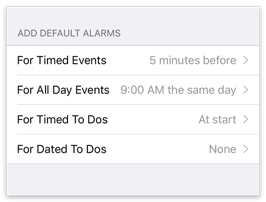
BusyCal enables you set different default alarms intervals for new timed events, all-day events, timed to dos, and dated to dos. To do this, go to Settings > New Event Defaults > Alarm Defaults.

Then tap any of the following:
- For Timed Events — Tap the time at which you want default alarms for timed events to occur (such as “At start,” “5 minutes before,” or “1 hour before”), or tap None to have no default alarm for timed events.
- For All Day Events — Tap the option for when you want default alarms for all-day events to occur: “On same day (9:00 AM),” ”1 day before (9:00 AM)”, “2 days before (9:00 AM),” or “1 week before.” Or tap None to have no default alarm for all-day events.
- For Timed To Dos — Tap the time at which you want default alarms for timed to dos to occur (such as “At start,” “5 minutes before,” or “1 hour before”), or tap None to have no default alarm for timed to dos.
- For Dated To Dos — Tap the option for when you want default alarms for dated to dos to occur: “On same day (9:00 AM),” ”1 day before (9:00 AM)”, “2 days before (9:00 AM),” or “1 week before.” Or tap None to have no default alarm for dated to dos.
Enable BusyCal Notifications
BusyCal can display alarms for events and to dos using iOS Notifications.
To have BusyCal generate alarms:
- In BusyCal, go to Settings > App Icon & Alerts.
- Turn on Event Alarms and To Do Alarms.
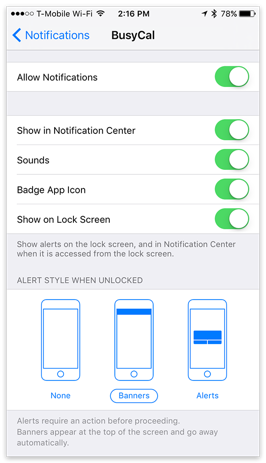
- In the main iOS System Settings app, go to Notifications > BusyCal. Turn on all desired options (likely all of them) and tap Banners (the default) or Alerts for the alert style when your iOS device is unlocked.
Disable Calendar and Reminders Notifications
If you’ve enabled BusyCal Notifications, you should disable Notifications for Calendar and Reminders, to avoid receiving duplicate alerts.
To disable alarms in Calendar and Reminders:
- In the main iOS System Settings app, go to Notifications > Calendar and turn off Allow Notifications.
- In the main iOS System Settings app, go to Notifications > Reminders and turn off Allow Notifications.
If you turn off notifications for Reminders, you can still receive location-based alerts in BusyCal, but you must go to the main iOS System Settings app and tap Privacy > Location Services > BusyCal and tap Always (not just While Using the App).
![]()
