Getting Started with BusyContacts
This tutorial provides instructions for getting started with BusyContacts and an overview of its features.
Some images in our online documentation may appear outdated as BusyContacts continues to evolve over time. However, the core functionality mentioned in the documentation still applies. We are currently in the process of updating every screenshot.
Introduction
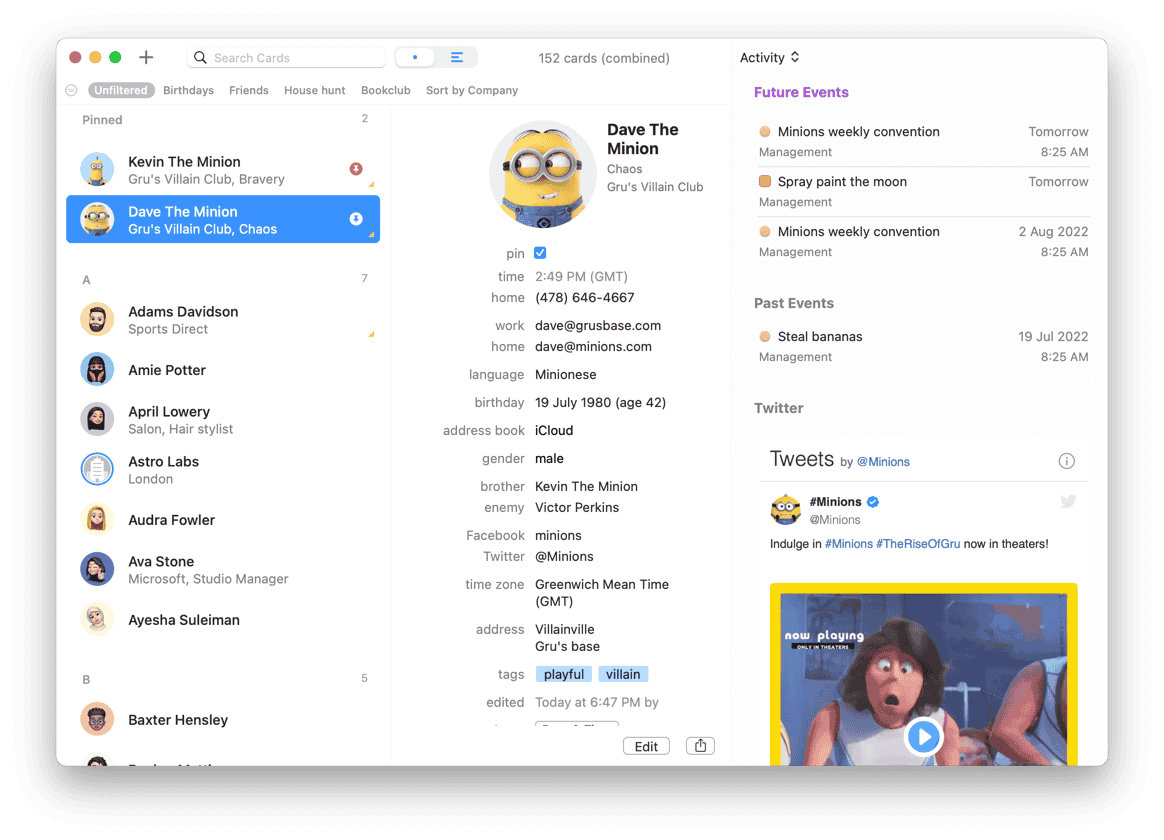
BusyContacts is a replacement for the built-in Contacts app on macOS (requires macOS 10.13+, and supports Apple silicon) — designed to make creating, finding, and managing contacts faster and more efficient.
BusyContacts brings to contact management the same power and flexibility that BusyCal users have enjoyed with their calendars. What's more, BusyContacts and BusyCal integrate seamlessly together to become the ultimate contact and calendar solution on the Mac.
BusyContacts syncs with the built-in Contacts app on macOS via iCloud (CalDAV) and by extension to all your iOS devices. BusyContacts supports all the leading cloud services (iCloud, Google, Office 365, Exchange, etc.).
Getting Started
After downloading and launching BusyContacts, you will be presented with a Settings Dialog where you can add your first account. This initial setup ensures BusyContacts can sync with your preferred service.
Unlike the built-in Contacts app, BusyContacts does not sync directly with Apple Contacts. Instead, it connects to a CardDAV or Exchange service of your choice, such as iCloud, Google, Microsoft Office, and others, providing additional features and flexibility.
Syncing with iCloud, Exchange, and Google
BusyContacts supports various services, including iCloud, Office 365, Exchange, Google, Fastmail, Fruux, Kerio, Zimbra, and more. You can add or remove accounts anytime by going to BusyContacts > Settings > Accounts.
For more details, see Syncing with a Server.
Syncing with macOS Contacts
BusyContacts can sync with the built-in Contacts app on macOS through a cloud-based service (iCloud, Exchange, Fruux, Google, or a CardDAV server). If macOS Contacts is already syncing with a cloud-based service, it should automatically sync with BusyContacts once you've configured BusyContacts to sync with the same account as described above.
BusyContacts will not sync local "On My Mac" contacts with macOS Contacts.
Syncing with an iPhone
BusyContacts runs only on the Mac but it can sync with the built-in Contacts app on iOS through a cloud-based service (such as iCloud). If you were previously syncing macOS Contacts and iOS Contacts through a cloud-based service, your iPhone should automatically sync with BusyContacts once you've configured BusyContacts to sync with the same account.
BusyContacts will only sync contacts with an iOS device through a cloud-based service. BusyContacts will not sync local "On My Mac" contacts with the iPhone. However, it will sync with your iPhone via iCloud. See how to sync with iCloud for more information.
Address Books
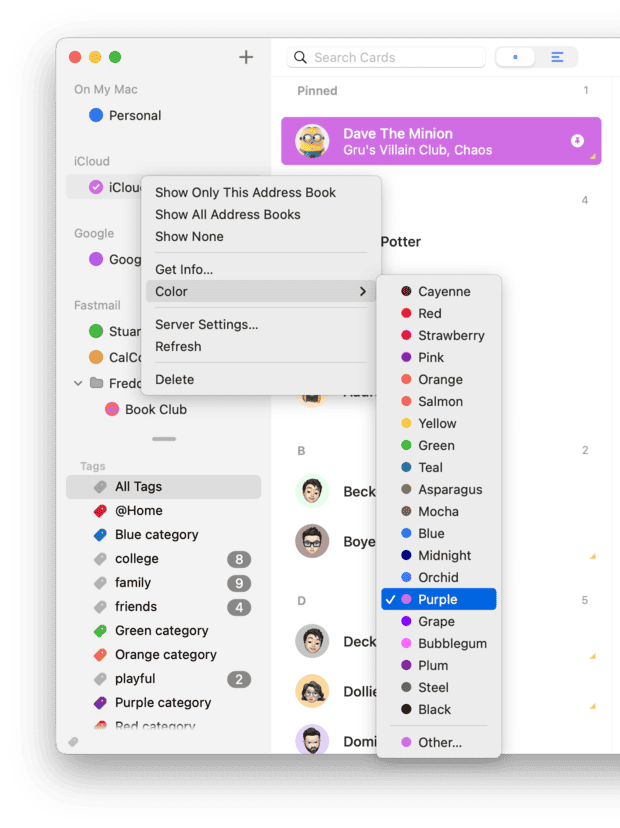
The Source List displays your Address Books grouped by server. This is the panel on the left side of the main window.
You may change the color of an address book (and the color of all of its contacts) by control-clicking on it and choosing a color, or double-clicking on it to open the Address Book Info dialog.
Tag List
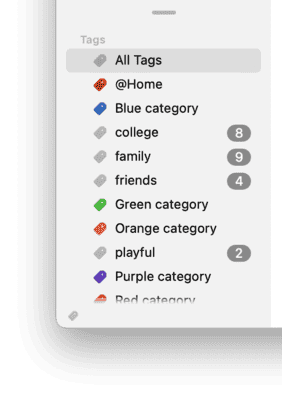
The Tag List appears in the left sidebar. Selecting a tag in the Tag List will filter the view to show only contacts that are assigned to that tag.
- Tags in BusyContacts map to Groups in Apple Contacts and iCloud.
- Tags in BusyContacts map to Categories in Outlook and Exchange.
- Tags in BusyContacts do NOT map to Groups on Google Contacts. (Note: Tags in BusyContacts appear as Contacts on Google Contacts, which is a side effect of syncing Tags in BusyContacts with Groups in Apple Contacts.)
For more info, see Tags.
Views
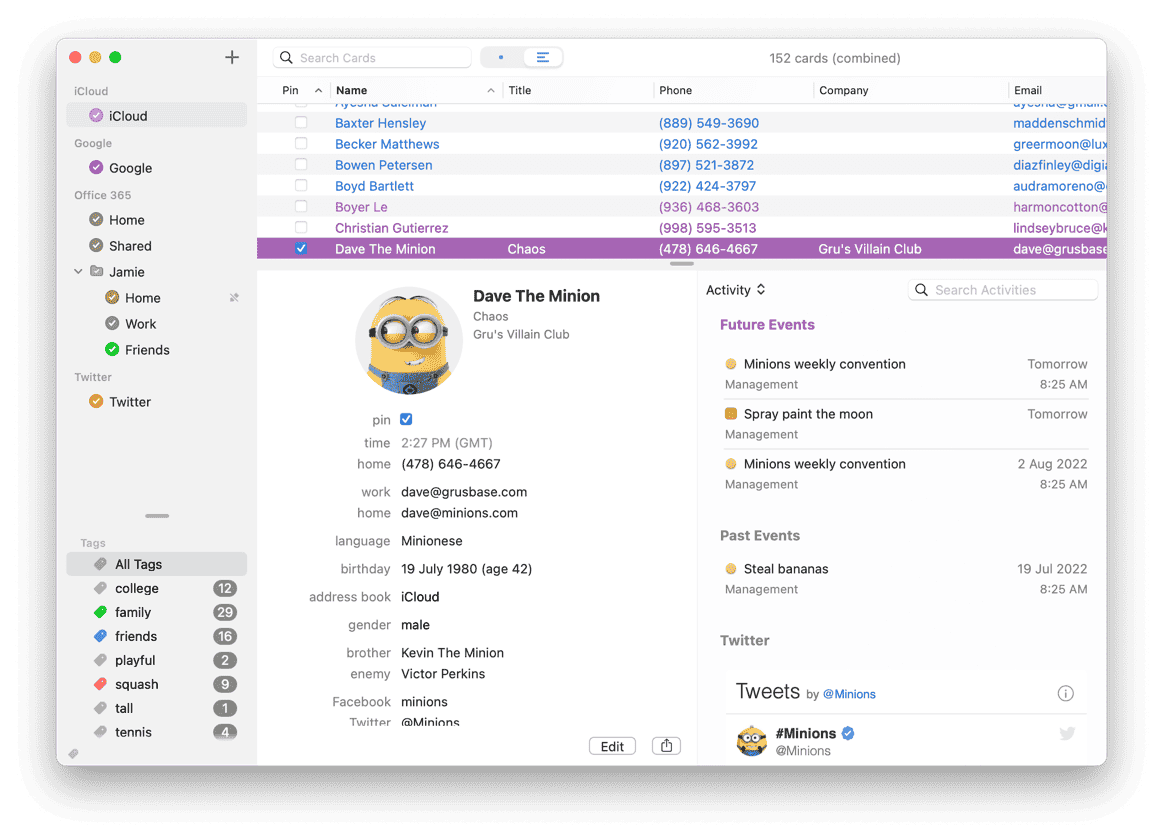
BusyContacts can display your contacts in two formats — Card View and List View.

The Card View lists your contacts in a single column on the left with each card displaying a photo, name and subtitle (company, title, city or email domain).

The List View displays your contacts in a table with customizable columns and sort order.
For more info, see Card View and List View
Info Panel
The info panel displays the details of the selected contact.
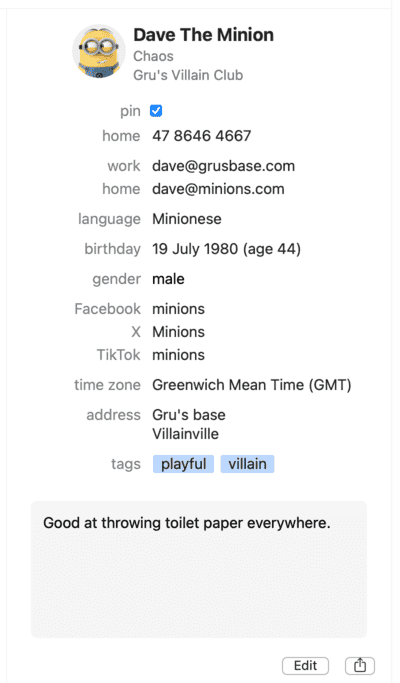
While viewing a contact, if you hover the pointer over a field, a link will appear enabling you to perform the default action for that field when clicked (e.g. dialing the phone number or generating an email).

If you click on a field label, you will see the other actions that can be performed for that particular field type.
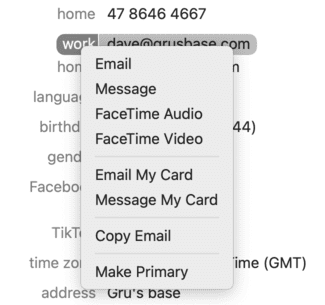
If you have multiple values of the same type (e.g. work phone and mobile phone), you can set one of them as the Primary field by clicking on the field label and choosing **Make Primary((.
The primary field for each type is displayed first. So, in the example above, setting the mobile phone as Primary, will move it to the top of the list of phone numbers.
For more info, see Info Panel.
Creating and Editing Contacts
You can create new contacts in BusyContacts via Quick Entry or manually:
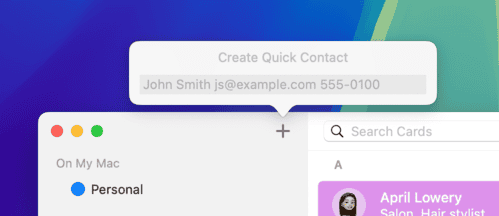
Click the Plus (+) button in the toolbar to open the Quick Entry dialog where you can enter some free-form contact data and press return. BusyContacts will parse the data, enter it into the appropriate fields, and put you into Edit mode where you can further edit the information.
Or, select File menu > New Contact (or type Command-N) to create a new blank contact card and go into Edit mode. You can then tab through the fields and enter your data.
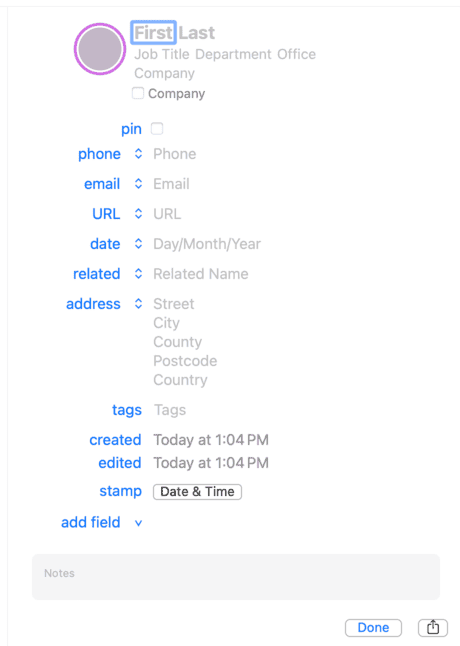
As you type, a list of matching entries will be displayed and the text will auto-complete as you type. For example, typing "app" in the Company field will auto-fill "Apple".
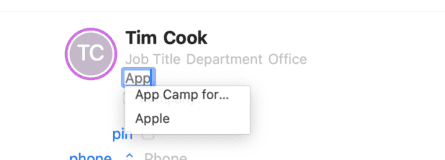
While editing a contact, if you need to enter a field that is not showing by default, click the add field popup menu on the bottom of the info panel and choose a field to add. If you want to show the field by default, you can add it in Info Panel Preference.

For more info, see Creating and Editing Contacts
Action menu
The Action menu appears on the bottom right corner of the Info Panel. It allows you to perform several actions for the selected contact, including sending an email or instant message, initiating an audio or video chat via FaceTime or Skype, creating a new linked event in BusyCal, or sending your vCard to the contact via Mail or Messages.

Contextual menu
You can CTRL+Click (right-click) on one or more contacts to display a contextual menu with the following functions:
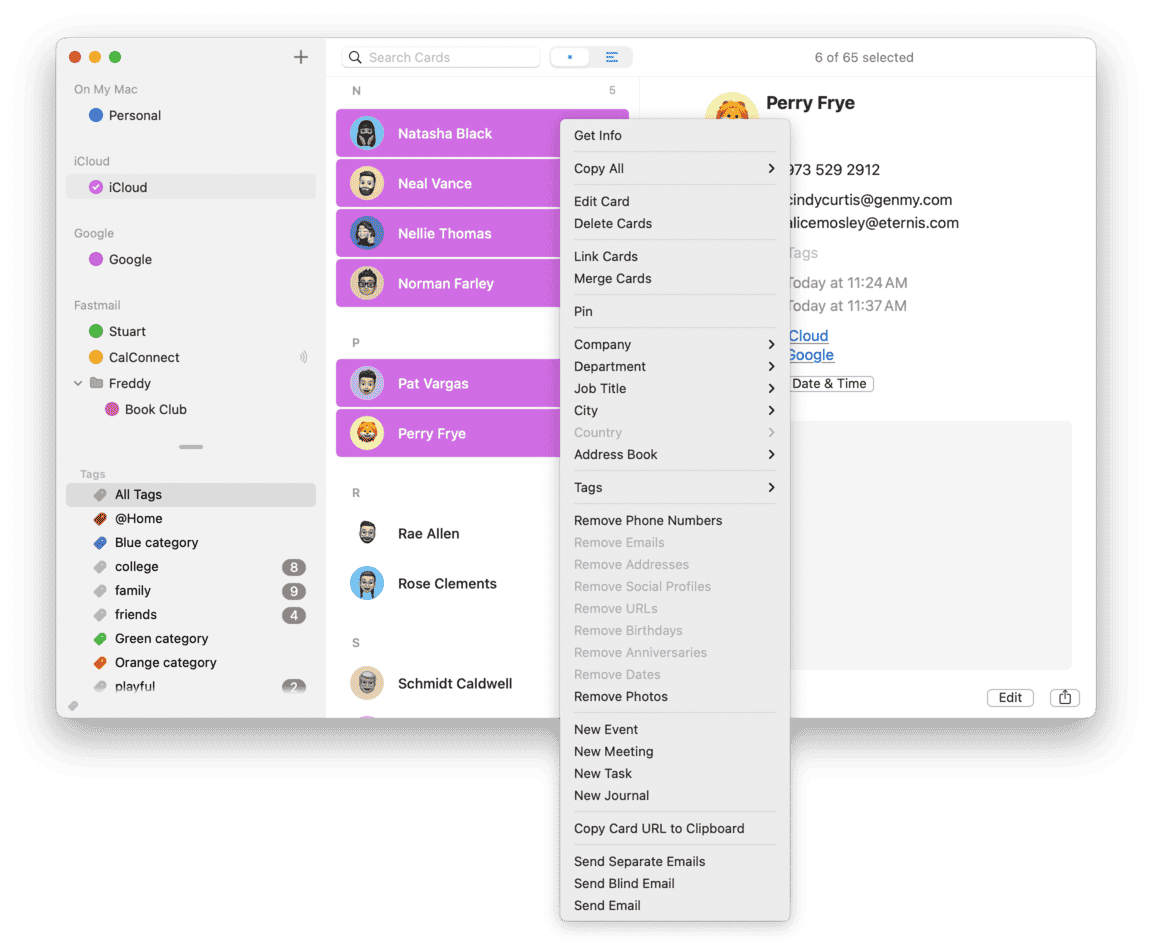
Some notable options:
- Get Info — Opens a floating info panel for the selected contacts.
- Edit Card — Switches to Edit mode.
- Link or Merge Contacts — Allows you to Link or Merge the seleted contacts.
- Address Book — Allows you to move the contact(s) to a different Address Book.
- Tags — Allows you apply Tags to the selected contacts.
- Flag — Allows you to Flag or unflag the selected contacts.
- New Event/Meeting/To Do/Journal — Allows you to create a new event in BusyCal that is linked to the selected contact(s).
- Send Separate Emails — Creates a separate email addressed to each of the selected contacts.
- Send Blind Email — Creates a single email addressed to all of the selected contacts as blind carbon copies.
- Send Email — Creates a single email addressed to all of the selected contacts.
Activity List
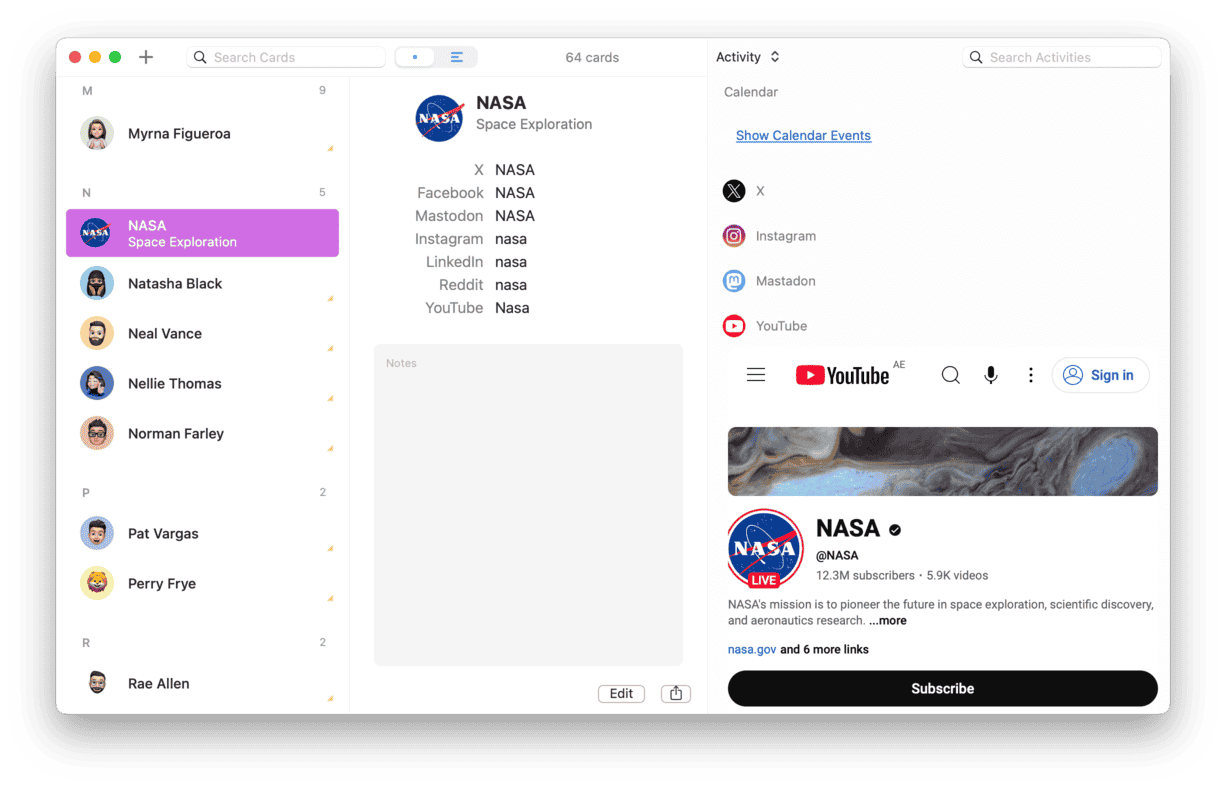
The Activity List provides a chronological view of activities associated with a selected contact, allowing you to browse their related social media feeds from one place. This requires
To show or hide the Activity List, go to View > Show/Hide Activity List. For more info, see Activity List.
Activity Categories
- Calendar Events – Displays events from BusyCal that include the selected contact as a participant or a linked contact.
- Twitter (X) – Shows the user’s X (formerly Twitter) feed via nitter.net, as direct access is no longer available.
- Bluesky – Displays the user’s Bluesky feed.
- Mastodon – Shows the user’s Mastodon feed.
- Instagram – Displays the user’s Instagram feed via pixwox.com, as Instagram restricts direct feed access.
- TikTok – Shows the user’s TikTok feed.
- YouTube – Displays the user’s YouTube feed.
- Reddit – Shows the user’s Reddit feed.
Adding Social Profiles
The Activity List displays social network feeds when available for the selected contact. To add a new social profile, follow these steps:
- Select a contact and click Edit.
- Click Add Field.
- Choose Social Network.
- Click the Social label in the new field and select the appropriate platform.
- Enter the username or profile URL, then click Done.
The selected social profile will now appear in the Activity List if supported.
Business Card Reader
BusyContacts features a powerful Business Card Reader that uses on-device OCR and natural language processing to instantly convert business cards, screenshots, and email signatures into contacts. Simply drag and drop an image or use File > New Contact from Image to get started.
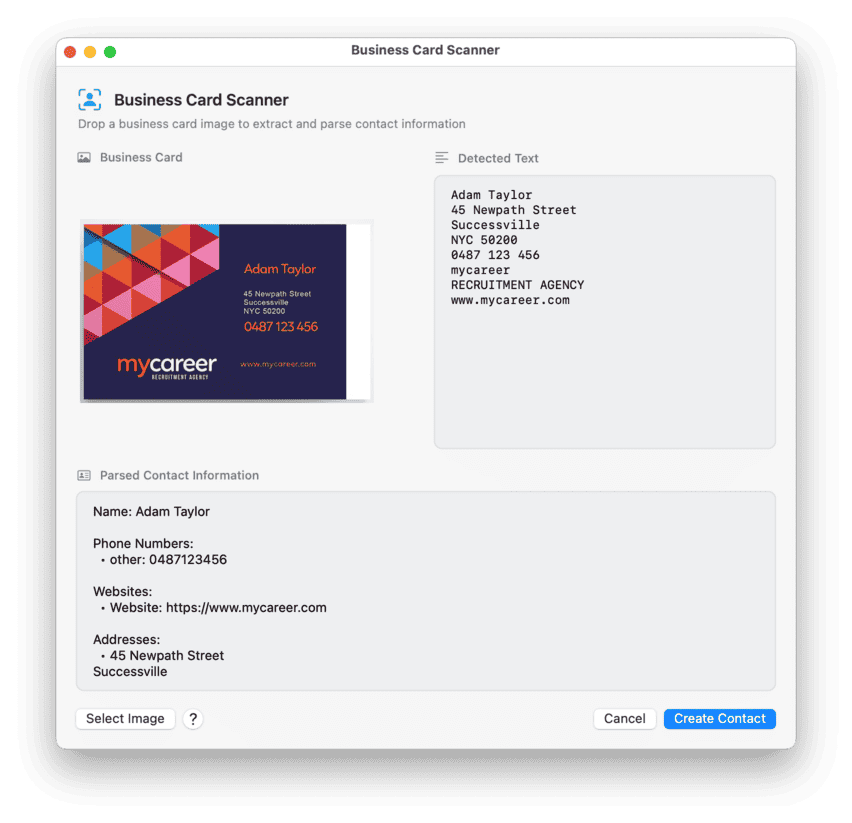
For more info, see Business Card Reader.
QR Code Generation
BusyContacts includes a built-in QR code generator that creates scannable codes from your contact information, making it easy to share vCard data with others. You can also import QR coded vCards by dragging QR code images directly onto the BusyContacts icon in the Dock or by using the File > New Contact from Image option.
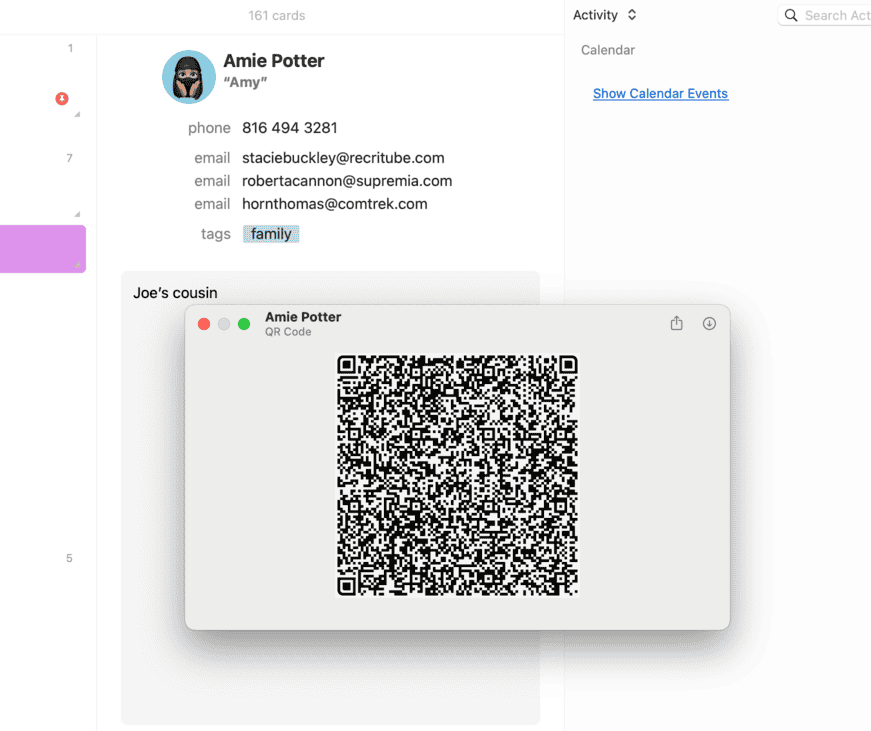
For more info, see QR Code Generation.
Linking Contacts with Events in BusyCal
The Activity List displays a list of Calendar Events for the selected contact. Only BusyCal events that include the selected contact as either a meeting participant or linked contact will be shown.
- Meeting participants appear in the Attendees field of a calendar event in BusyCal.
- Linked contacts appear in the Contacts field of a calendar event in BusyCal.

To create a new linked event in BusyContacts, select File > New Linked Event (or type Command-Option-E).

Or you can control-click on a contact and choose New Event from the contextual menu.

That will launch BusyCal and create a new event with the contact added to the Contacts field. You may edit the event details in BusyCal.

You can also link a contact to an event directly in BusyCal by entering the contact name in the contacts field. BusyCal will auto-complete the entry based on the matching records in BusyContacts.

For more info, see Linking Contacts with Events in BusyCal.
Birthdays and Anniversaries
You can display the Birthdays and Anniversaries of your contacts in BusyCal. In BusyCal, select BusyCal > Preferences > General, and select the Show Birthdays calendar and Show Anniversaries calendar checkboxes.


You can hide unwanted Birthdays from you calendar by unchecking the Show Dates checkbox that appears below the date fields. Note: The Show Dates checkbox will only appear in BusyContacts while you are in Edit mode, and you must enable the Show Dates in Calendar field in Settings > Info Panel, or add that field to a specfic card using the add field popup.

For more info, see Birthdays and Anniversaries.
Linking and Merging Cards
If you are syncing with multiple services, you are likely to have duplicate cards for many of your contacts (e.g. each contact may have duplicate cards on iCloud, Google and Twitter).
To solve this, BusyContacts allows you to link related cards to each other and combine them into a single virtual card. BusyContacts automatically links related cards that share common traits, such as the same name or email address. And you can manually link cards as well.
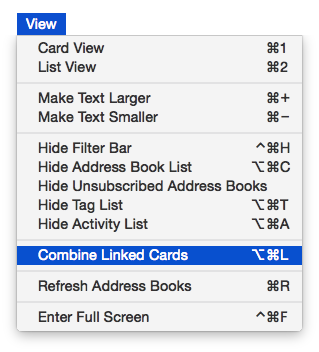
Linked cards from multiple sources can be viewed as a single virtual card when in Combined mode by selecting View > Combine Linked Cards.
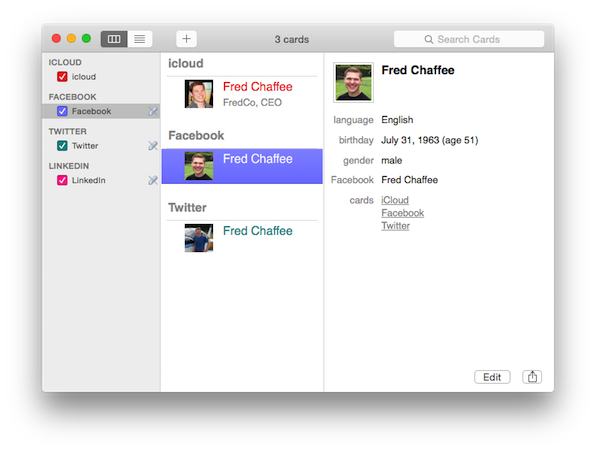
For example, when in non-combined mode, three linked cards appear for Fred Chaffee — one each on iCloud, Google and Twitter.
When in Combined Mode, the three linked cards are merged into a single virtual card that displays all of the combined info from each of the individual cards.
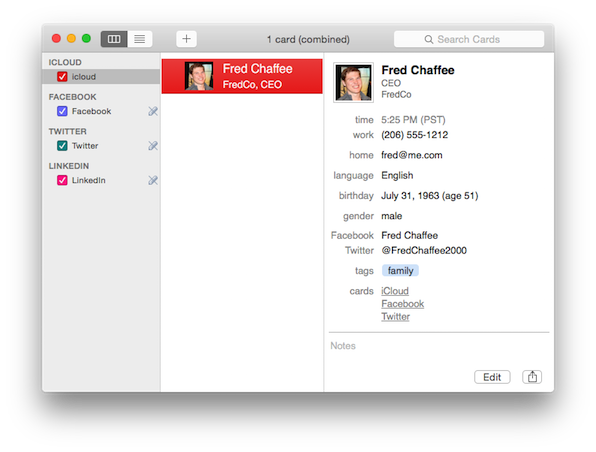
When cards are linked to each other, the Info Panel displays links to each of the individual cards.

If you click on one of these links, the individual card will open in a separate window where you can view and edit the information specific to that individual card.

BusyContacts automatically links related cards that share common traits, such as the same name or email address. But you can manually link cards as well by selecting the cards you want to link (by shift-clicking or command-clicking them), then choose Link Cards from the Edit menu (or control-click and choose Link Cards from the contextual menu).

Linking cards does not alter any data. When in Combined mode, it displays a virtual card that combines the data from each of the individual cards.
For more info, see Linking and Merging Cards.
Sharing Address Books
BusyContacts enables you to share address books with other BusyContacts users.
Address book sharing is supported by Fruux, Exchange, Kerio, Zimbra, macOS Server, and over the LAN. It is not supported by iCloud or Google, but you can work around it on these services by syncing with multiple accounts.
Following is a brief description of each of the services that support Address Book sharing with BusyContacts:
- Fruux — Fruux is a CalDAV and CardDAV hosting service and is the only CardDAV service that supports address book sharing with BusyContacts and iOS Contacts.
- Exchange — Exchange supports address book sharing with BusyContacts and Outlook. You can run your own Exchange server or use a hosted service like Office 365, Rackspace, GoDaddy and others.
- Kerio — Kerio supports address book sharing with BusyContacts when syncing via the Exchange EWS protocol. You can run your own Kerio server or use a hosted service like GetSync'd Hosted Kerio.
- Zimbra — Zimbra server 8.5 and later supports address book sharing with BusyContacts when syncing via the Exchange EWS protocol.
- LAN — you can share address books over the LAN peer-to-peer with other BusyContacts users, without requiring a server. The main limitation to this approach is that you can only share local address books, which cannot be synced with an iPhone.
For more info, see Sharing Address Books.
Smart Filters
Smart Filters are a powerful tool for filtering contacts and customizing the List View. Smart Filters are displayed on the Filter toolbar where they can be applied with a single click. You can create smart filters to:
- Show contacts that match certain conditions.
- Display a set of address books.
- Apply view settings, such as the columns displayed and sort order in the List View.
You can create Smart Filters to show contacts that match certain criteria, such as a company name, a recent modification date, or a birthday in the next 30 days.
For example, to create a smart filter for all contacts that work at Apple, select New Smart Filter from the Filter menu, and enter the settings shown below.

A button will appear on the Filter Bar, and clicking it will apply the filter. You'll note that the filter button appears in blue, which indicates that it is only showing events that match certain conditions.

You can also create Smart Filters from Saved Searches. For example, if you enter "apple" into the search field, it will find all contacts that contain the word "apple" in any field (e.g. a name of Johnny Appleseed, a company name of Apple Inc., or notes containing the word apple, etc.).

After entering a search value (1) a Save button will be exposed, if you click the Save button (2) it will create a Smart Filter (3) with the conditions of your search.
And you can create multiple List View formats (e.g. a view that displays and sorts by the company column, and another view that shows custom fields) and save them as Smart Filters so you can instantly display them with a single-click.

- Switch to List View and customize the number of columns shown and the sort order.
- Select New Smart Filter from the Filter menu, click "Remember view settings & preferences", name the filter and click OK.
- A button will appear on the Filter Bar, and clicking it will display the custom view.

For more info, see Smart Filters.