Using BusyCal with iCloud
iCloud is Apple's free online service, which includes calendar syncing among its many features. BusyCal can connect to iCloud Calendar directly for syncing calendars across your devices and sharing them with others.
For details on using BusyCal with iCloud, see the following:
Syncing with iCloud
Apple requires all third-party apps to connect to iCloud using a special app-specific password, which protects your real password. Before adding your iCloud account to BusyCal, you must first generate an app-specific password (explained below). This extra step ensures security while allowing BusyCal to sync with your iCloud data. Learn how to generate an app-specific password.
BusyCal can use iCloud to sync calendar data across all your devices.
To sync BusyCal with iCloud, do the following:
- First and foremost, navigate to https://support.apple.com/HT204397 using your browser and follow instructions on generating an app-specific password for your iCloud account (see demo video below). If you have already performed this step for some other app in the past or for another device running BusyCal, you may re-use the same password on this device. App-specific passwords can be re-used multiple times in several apps, if desired. After you have generated an app-specific password, save it some place secure in order to re-use it on another device running BusyCal. When unsure, generate a new one and copy / paste it somewhere secure.
Over the years we've gathered some best practices:
- If you have a
@mac.comemail address, replace it with a@icloud.cominstead when using with BusyCal - iCloud allows one to generate aliases for their primary iCloud email addresses. When using it with BusyCal, you must only use your primary iCloud email address to login, aliases do not work.
- Your device must be configured to Set time and date automatically under System Settings > General > Date & Time otherwise the password will superficially fail to work without an obvious reason.
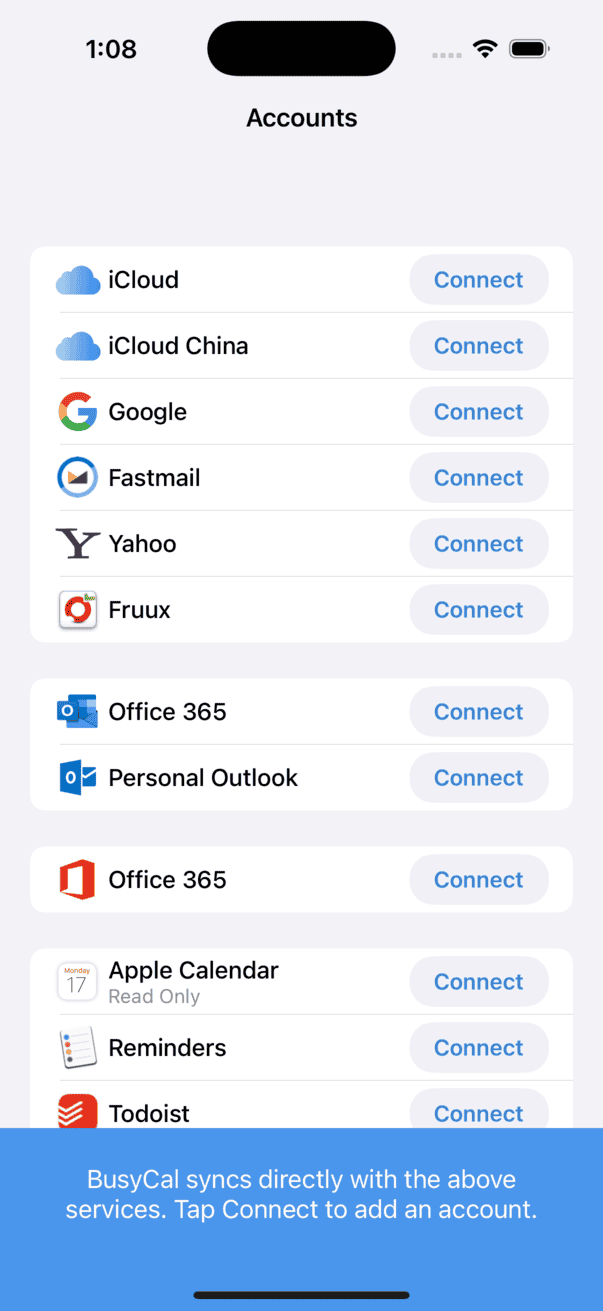
- Next, open BusyCal > Settings > Accounts
- Scroll down and tap the Add Account button.
- Tap Connect next to iCloud
- Enter your iCloud email address and the app-specific password generated in
step 1above and click OK.
Generating App-Specific Password
The following video demonstrates how to generate and use an app-specific password for iCloud.
- Log into your iCloud account: https://account.apple.com/
- Generate an app specific password
- Copy the password and use in BusyCal iOS. Preferably, save this password securely for future use.
Hosting Calendars on iCloud
iCloud functions as a CalDAV server that hosts your calendars and syncs them with client apps.
BusyCal (for both iOS and Mac) and the built-in Calendar app on iOS and macOS are CalDAV clients that sync with iCloud.
This means any data you create on an iCloud calendar using the built-in Calendar app on iOS or macOS will sync to BusyCal through iCloud, and vice versa. As long as you are hosting all your calendars on iCloud and have all client apps configured to sync with the same iCloud account, all your calendar data will remain in sync.
Calendars Must Be Hosted on iCloud
All calendars you want to sync between your iOS devices, Macs, and other users must be hosted on iCloud. You cannot sync calendars from other sources (Google, Exchange, etc.) to iCloud.
Connecting to iCloud with an App-Specific Password
Apple requires all third-party apps that sync with iCloud (like BusyCal) to use app-specific passwords. An app-specific password is essentially a custom password that is different than your standard iCloud password. Only Apple's apps (Mail, Calendar and Contacts) can use your standard iCloud password. All other apps must use an app-specific password to connect with your iCloud account.
Please read these instructions for setting up an iCloud App-Specific password for BusyCal.
Sharing Calendars with Others through iCloud
iCloud enables you to share calendars with other iCloud users. Once each user has configured BusyCal to sync with their personal iCloud account, you can share calendars with each other through iCloud. When a calendar is shared through iCloud, events can be edited by any user and changes sync between them.
However, you cannot set up a shared calendar within BusyCal for iOS; you must do this in BusyCal for Mac, on the iCloud website, or in the Calendar app on iOS or macOS. For details, see Sharing Calendars with Others through iCloud in the BusyCal for Mac help.
Notifications of Changes to Shared Calendars
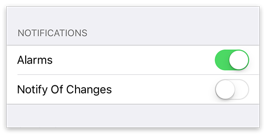
When sharing calendars with others, you can choose whether changes to that calendar made by other people appear in your Inbox. To do so, go to Settings > Calendars and tap the “i” icon next to the calendar name. Then turn Notify Of Changes on or off.
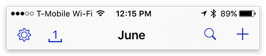
Tap the Inbox (next to the gear icon) to display your notifications.
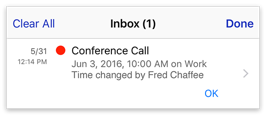
Tap OK to dismiss each message in the Inbox. Or, tap Clear All to dismiss all messages with a single tap.
iCloud Limitations
iCloud places certain limits on calendar data.
Quota Limitations
iCloud limits the amount of data you can sync with BusyCal, as follows:
Calendars and Reminders
- Total number of calendars, events, and reminders: 50,000*
- Maximum combined number of calendars and reminder lists you can have: 100*
- Maximum size of all calendar and reminder data (not including attachments): 1GB*
- Maximum number of characters in a reminder title: 1,000*
- Maximum size of a calendar event including attachments: 20MB
- Maximum number of attachments per event: 20
- Maximum number of attendees you can invite to an event: 300
- Maximum number of people with whom you can share a private calendar: 100
*If you have upgraded your iCloud reminders on a device running iOS 13, iPadOS, or macOS Catalina or later, these limits on reminders do not apply. Learn more about the Reminders upgrade process.
For more information, see iCloud: Limits for Contacts, Calendars and Reminders.
Calendar Limitations
BusyCal syncs all its data types (events, tasks, tags, etc.) with iCloud.
If you are syncing BusyCal on multiple devices with the same iCloud account, all these data types should sync seamlessly. However, there are some limitations to be aware of when syncing these data types with other apps (such as Calendar for iOS or macOS) through iCloud:
- Tags applied to events in BusyCal sync with other copies of BusyCal through iCloud, but do not appear in Calendar or other clients.
- Tasks in BusyCal sync with the Reminders app on iOS and macOS through iCloud. They do not appear in Calendar for iOS or macOS.
⚠️ Troubleshooting
Account not Syncing
If iCloud fails to connect or displays cryptic error codes like -1012, it may be due to an incorrect or expired app-specific password.
This can happen for various reasons, especially if you recently reset your main iCloud password—doing so automatically revokes all existing app-specific passwords.
The most reliable solution is to remove your iCloud account from BusyCal and set it up again by following these steps. Please check tips under the Best Practices section as it could be due to one of the things mentioned in that section.
To remove and re-add your account:
- Open BusyCal Settings > Accounts.
- Select your iCloud account and tap
Delete Accountto remove it. - Tap
Add Accountin the Accounts screen to add a new account and follow these steps.
cannot log into iCloud, iCloud password. iCloud fails. iCloud login failure. iCloud password prompting. Can't login to iCloud. Cannot login. icloud error, icloud password, icloud app specific password, appspecific password Cannot sync with iCloud. Can't sync iCloud. iCloud won't sync. iCloud stopped syncing. iCloud password invalid. Password not working. iCloud password request. Forgot password. Forgotten iCloud. Lost password. Change password. old password not working. Old password failed. Login fails. Login failed. Password fails. Password not accepting. Password not working. Account not working. password keeps popping up. Password keeps prompting. Keeps prompting for password. Password prompt keeps popping showing up.
🛠️ Duplicate Tasks Appearing
Apple migrated tasks from iCloud Calendars to the dedicated Reminders app as part of an upgrade, explained here. This upgrade is triggered when launching the Reminders app and tapping the Upgrade button.
If you did not complete the upgrade, your task lists may appear in two places:
- Reminders app
- iCloud CalDAV server
Since both still reside on iCloud, adding both Reminders and your iCloud account to BusyCal will result in duplicate tasks, as BusyCal will fetch the same data from both sources.
To remove duplicates, follow these steps:
- Open BusyCal Settings > Accounts.
- Select Reminders from the list.
- Tap the delete button to delete the Reminders account.
This ensures that tasks sync only from your iCloud account, preventing duplicates.