Using BusyContacts with Exchange
Microsoft Exchange servers provide a number of online services, among which is syncing and sharing contacts. BusyContacts can connect to Exchange servers, using them to sync contacts across your devices and share them with others.
For details on using BusyContacts with Exchange, see the following:
Syncing with Exchange
BusyContacts can use Exchange servers to sync contacts across your devices.
To sync BusyContacts with Exchange, do the following:
- Choose BusyContacts > Settings > Accounts.
- Click the + (plus) icon to add a new account.
- Choose Exchange (or Office 365) from the Server Type pop-up menu, enter your Exchange email address and password, and click OK.
- The autodiscovery process begins and you may be prompted to enter additional login info. Once the process is complete, BusyContacts syncs with Exchange.
Sharing contacts with others through Exchange
BusyContacts enables you to share contacts with other Exchange users. Once each user has configured BusyContacts to sync with their personal Exchange account, you can share contacts with each other through Exchange. When an address book is shared through Exchange, contacts can be edited by any user and changes sync between them.
Contact sharing involves two steps. First, the host must share contacts with one or more users. Second, the client must subscribe to the shared contacts from the host.
Share an address book with other Exchange users
You can share an address book through Exchange with other Exchange users in your organization, as follows:
-
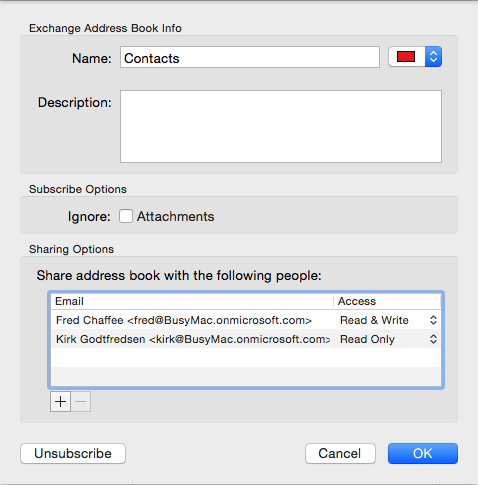
Control-click the address book in the left sidebar and choose Get Info from the contextual menu.
-
Click the plus (+) button and then enter the Exchange email address of the person you want to share the address book with.
-
Choose the access privileges you want to grant them.
Choices are:
- Read Only — User can view existing contacts but cannot create or edit them.
- Read & Create — User can view existing contacts and create new ones, but cannot edit existing ones.
- Read & Write — User can view, edit, and create contacts.
- Delegate — Same as Read & Write.
-
Click OK. An icon appears next to the address book in the left sidebar indicating that it is shared.
-
The person you shared with will need to add the shared address book as described next.
To share a secondary address book with someone, you must also share your primary address book with them, with at least Read access. Once you’ve granted someone Read access or higher to your primary address book, you can share secondary address books with them.
Subscribe to shared address book
If someone has shared an address book with you through Exchange, you must configure your Exchange account preferences to show the shared address book, as follows:
-
Choose BusyContacts > Settings > Accounts, select your Exchange account in the list on the left, click the Sharing tab, click the plus (+) button, and enter the Exchange email address of the user who is sharing contacts with you.
-
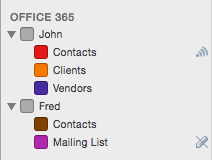
The shared address books then show up in the left sidebar, where you can subscribe to them by selecting their checkboxes.
Public Contacts
Exchange supports public contacts that can be shared with all users in an organization. Public contacts are created by your network administrator.
To subscribe to a public address book:
-
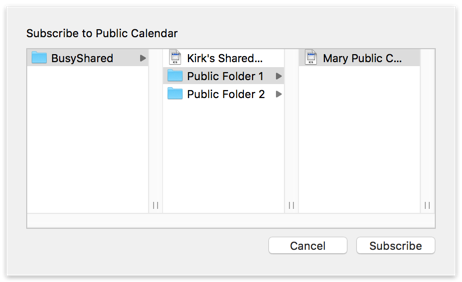
Choose BusyContacts > Settings > Accounts, select your Exchange account in the list on the left, click the Sharing tab, and then click Public Address Books.
-
In the browser that appears, navigate to the public folder that contains the address book you want to subscribe to. Select it and click Subscribe.
-
The public address book appears in the left sidebar.
If you want to unsubscribe from a public address book, Control-click it in the left sidebar and choose Unsubscribe from the contextual menu.
Notifications of changes to shared contacts
When sharing contacts with others, there are two options you may want to enable, for keeping track of changes to contacts on shared contacts:
-
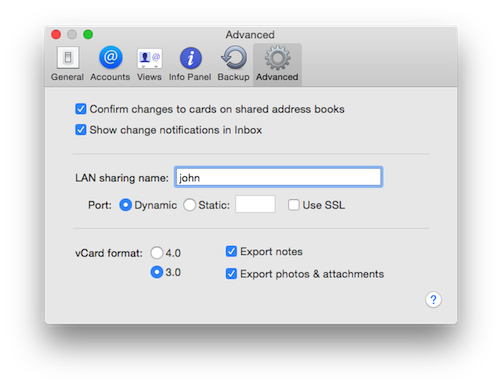
First, in BusyContacts > Settings > Advanced, select “Confirm changes to cards on shared address books” if you want to display a warning when you edit or delete an event on a shared address book.
-
Second, in the address book Info dialog for any given address book (which you can display by double-clicking the address book name in the address book List), select “Show change notifications in Inbox” to display a badge on the app icon and a message in the Inbox when contacts are added or changed by others, or deselect it to avoid seeing badges and Inbox notifications for that address book.
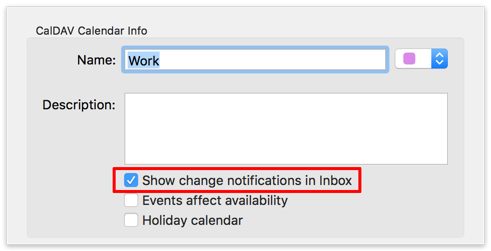
Click OK to dismiss each message in the Inbox. Or, hold down Option and OK changes to OK All, enabling you to dismiss all messages with a single click.
Exchange Limitations
Exchange places a number of limits on contacts, which restrict the range of options you can use in BusyContacts.
Exchange Server versions supported
BusyContacts supports Exchange 2007 SP3 and later, but BusyMac recommends Exchange 2013, which is more reliable than older versions.
Outlook.com is not supported
BusyContacts does not support outlook.com, nor the home offerings for Office 365. Only full Exchange services are supported, such as Office 365 for business.
Push
Push is not supported in Exchange 2007. Push is supported only in Exchange 2010 or later.
Sharing secondary contacts
To share a secondary address book with someone, you must also share your primary address book with them, with at least Read access. Once you’ve granted someone Read access or higher to your primary address book, you can share secondary address books with them.