LAN Calendar Sharing (Deprecated)
lan calendar sharing, peer-to-peer calendar, calendar sharing on network, local network calendar, bonjour calendar sharing, share calendar on lan, calendar sharing without cloud, local calendar sharing, network calendar sync, publish calendar on lan, subscribe to lan calendar, deprecated lan sync, local area network calendar, peer calendar sharing, offline calendar viewed between two computers macs, share calendars between macs computers
BusyCal allows you to share calendars peer-to-peer with other BusyCal users on your local area network using Bonjour zero-configuration networking.
The BusyCal peer-to-peer sharing model allows users to publish local calendars on their LAN that other BusyCal users can subscribe to without requiring a server or cloud-based service such as iCloud, Google, or Exchange. In effect, this lets you view and share offline calendars between two or more macs.
This peer-to-peer method of sharing is supported only by BusyCal, and is not supported by the Calendar app for iOS, BusyCal for iOS, or other clients. If you want to sync calendars with an iOS device, or share calendars with users who are not running BusyCal, you should use a cloud syncing service such as iCloud, Google, or Exchange.
Publishing Calendars
To publish a calendar or address book on your LAN, Control-click the calendar and select Publish to LAN.
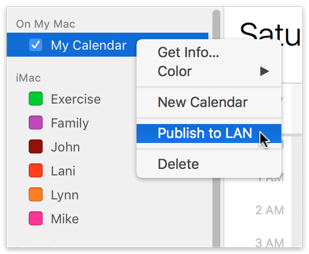
An icon appears next to the calendar name indicating that it is being published.

Publish Options
To set access privileges for the published calendar, double-click it to open the Info dialog. The Publish Options section enables you to specify the access privileges for a calendar book by setting a combination of read-only and read-write passwords. When a user subscribes to a calendar they will be granted the appropriate privileges based on the password they enter.
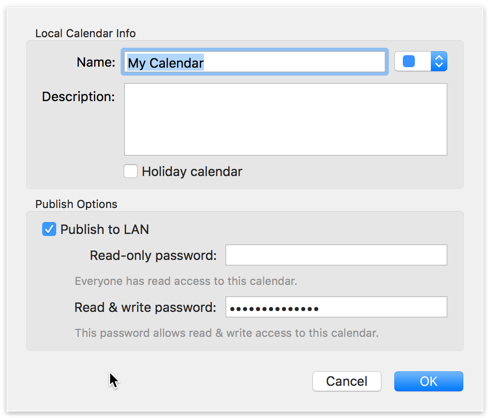
There are four possible combinations of access privileges, as follows:
- Everyone can read and write — Leave both passwords blank to allow everyone full read-write access to your calendar without requiring a password.
- Everyone can read; write protected — Leave the read-only password blank and enter a read-write password to allow everyone read access, while requiring a password for read-write access.
- Read and write protected — Enter a password in both fields to require a password to read or edit your calendar. Use a different password for each so subscribers will be granted the appropriate privileges based on the password they enter (either a read-only password or read-write password).
- Read protected; no write access — Enter a read-only password and leave the read-write password blank to require a password for reading, while prohibiting write access.
Once a calendar is being published on the LAN, other BusyCal users on the LAN can subscribe to it.
Subscribing to Calendars
If a BusyCal user on your network is publishing calendars, the calendars will automatically appear in your source list in gray. You may subscribe to a calendar by selecting its checkbox, at which point its color changes from gray to some other color, and the calendar is synced to your Mac.
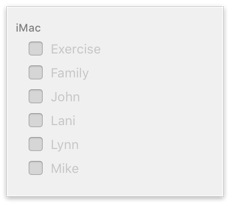
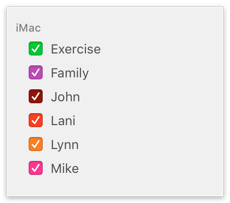
If the calendar is password protected, you’ll be prompted to enter a password for read-only or read-write access. If you have write privileges, you may edit events or contacts on that calendar, and those changes are synchronized with the host that is publishing the calendar.
Subscribe Options
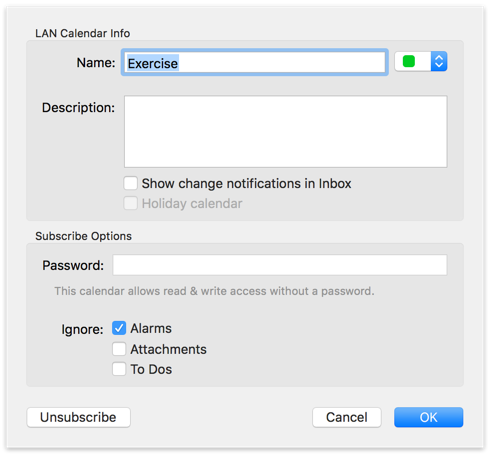
When you subscribe to a calendar, all events, to dos, alarms, and attachments are synced with your Mac. If you like, you can remove to dos, alarms and/or attachments by double-clicking the calendar to open the Info dialog and selecting the appropriate Remove checkboxes.
Unsubscribe
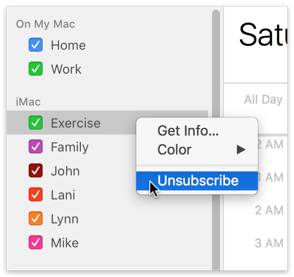
Once you've subscribed to a calendar, you can toggle the display of that calendar by selecting its checkbox. Even when a subscribed calendar is not being displayed, it remains in sync with the host. If you want to unsubscribe, you can Control-click the calendar and choose Unsubscribe from the contextual menu.
Publishing Calendars on a Dedicated Server
The publisher of a calendar is the host, and the subscriber is the client. There is only one host for each calendar, but there can be multiple clients. You may want to consolidate all the calendars you want to share on your network and publish them from a single host computer or dedicated server.
Publishing Calendars on a Central Host
To publish all calendars from a central host, you'll need to transfer the calendars you want to share to the host computer.
- On each client, export the calendars you want to move to the host by selecting the calendar and choosing File > Export > Calendar File (.ics). After successfully exporting each calendar, delete it on the client by Control-clicking it and choosing Delete from the contextual menu. Then transfer the exported calendar files to the host computer (via email or file sharing).
- On the host, double-click the calendar files to import them. Then publish the calendars on the LAN.
- On each client, subscribe to the calendars being published by the host.
Shared Calendar Messages
When sharing calendars with others, there are two options you may want to enable, for keeping track of changes to events on shared calendars:
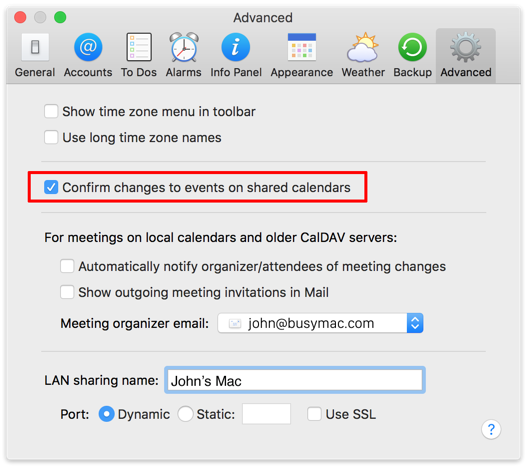
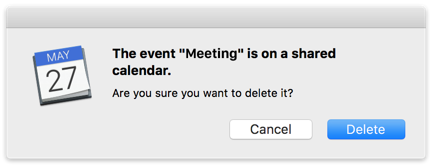
First, in BusyCal > Settings > Advanced, select “Confirm changes to events on shared calendars” if you want to display a warning when you edit or delete an event on a shared calendar.
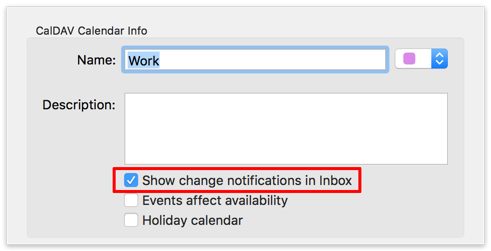
Second, in the Calendar Info dialog for any given calendar (which you can display by double-clicking the calendar name in the Calendar List), select “Show change notifications in Inbox” to display a badge on the app icon and a message in the Inbox when events are added or changed by others, or deselect it to avoid seeing badges and Inbox notifications for that calendar.
![]()
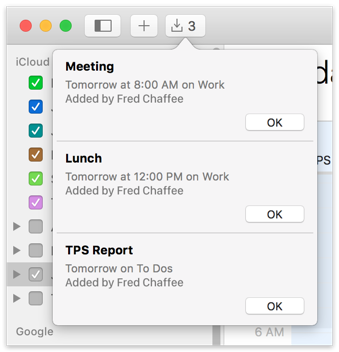
Click OK to dismiss each message in the Inbox. Or, hold down Option and OK changes to OK All, enabling you to dismiss all messages with a single click.